Search Results
Updated as of 24 August 2020.
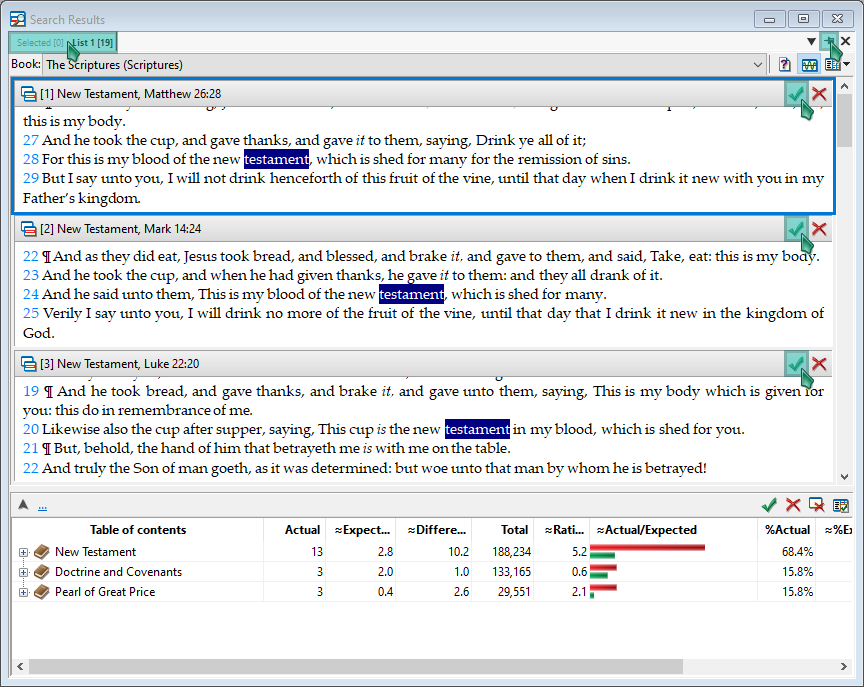
The Search Results window pops up after performing a search. From here, you can view all results in context, copy or save results, delete duplicate results, view the Frequency Distribution report, or use many of the analysis reports related to search results.
Results Window
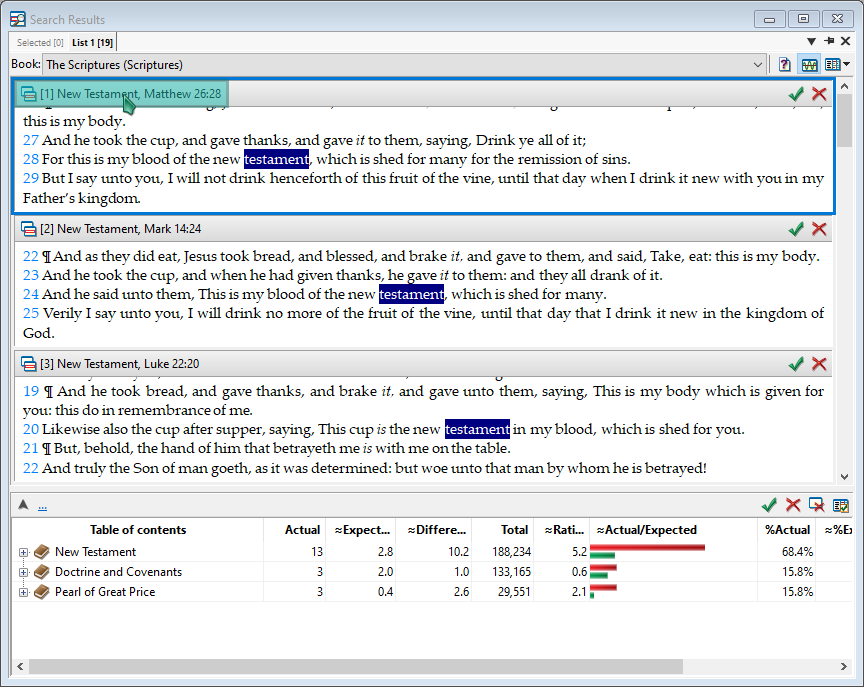
Each search result 'hit' will be highlighted in blue and displayed in a separate pane, with the citation for the hit location at the top of each pane. If hits are found near each other, each specific hit will have its own pane where it is highlighted in blue and any nearby hits will be highlighted in gray.
Frequency Distribution Report
The Frequency Distribution Report is described in detail here. If you would like to display this report, with a Search Results window open, navigate to Results > Frequency Distribution > Display Report.
View reference
You can view each result within the regular book view window by double-clicking on a result, or you can right-click and select View Reference.
Go to reference
Each search result is sequentially numbered. You can jump to a number by right-clicking within the search results pane and clicking Go to Reference.
Previous and Next Reference
When you double-click on a result in the Search Results window, it makes the Book View window active. You can go back to the Search Results window by pressing the Escape or ALT + Left command, but it might be more efficient to go to the previous/next reference by navigating to Go > Previous Reference/Next Reference. You can also use the shortcut commands ALT + N (Next) and ALT + P (Previous).
Copy Results
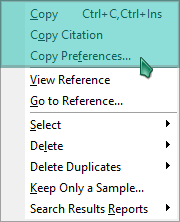
Right-clicking within the Search Results window and selecting Copy will copy all results and the contents of their lowest-level section. Selecting Copy Citation will simply copy the citation of whichever hit you select. Selecting Copy Preferences will take you to your User Preferences for Search Results.
Copy Example
This is an example of text that is copied from WordCruncher when the citation is included. Having the citation included with the output can save time when you need to refer to its location within the book later. This can be turned off in User Preferences.

Copy Preferences
More information on these options can be found here under the 'Options: Search Results' section.
Save Results
If there are search results that you would like to keep, you can "select" the results. There is a tab in the upper-left corner of the Search Results window titled Selected. You can select results and save them in the "Selected" tab by clicking on the green check mark in the upper-right corner of each result. This option is found at Results > Select > Select Reference. Alternatively, you can select all results by going to Results > Select > Select All References.
Delete Duplicates
Right-click within the Search Results window and then select either Delete or Delete Duplicates for options on customizing which references appear in your search results. The Delete menu provides three options: Delete Reference will remove a search result from the results; Delete All References will remove all results in the current list.
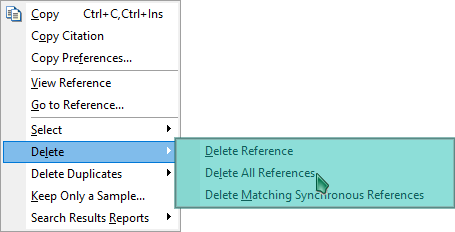
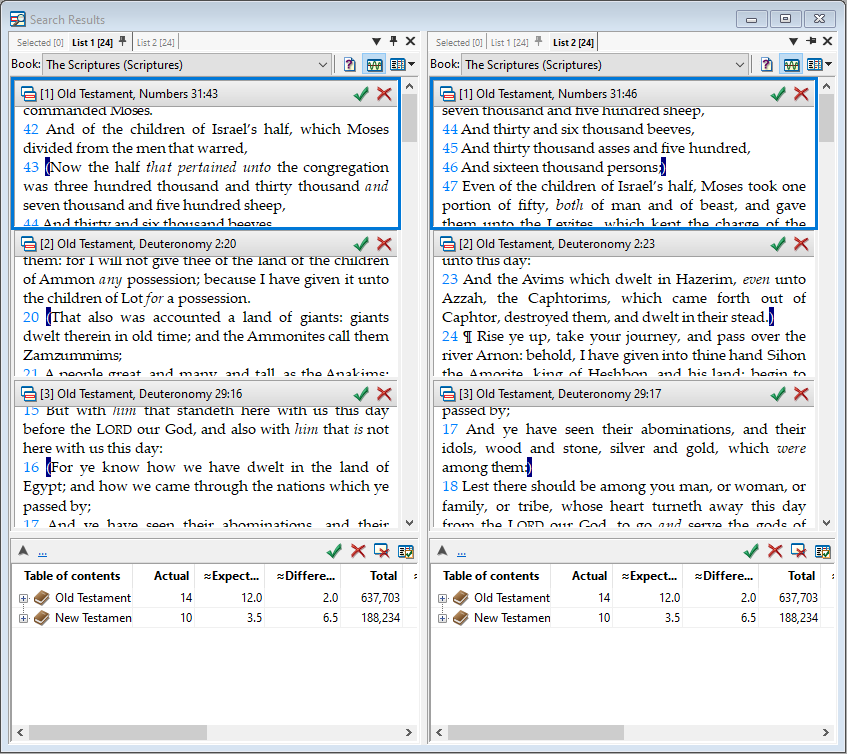
The third option, Delete Matching Synchronous References, will remove any results where matches occur within the same level. This is useful for performing one search for open parentheses, and another search for close parentheses and viewing them side by side, as shown above (instructions for viewing two search results side by side can be found in the next section, 'Window Settings'). Selecting this option will remove any results where open and close parentheses occur at the same level, leaving only results where one or another occurs without the other at a given level. For example, in the image above we can see that an open parenthesis occurs in verse 43, but the close parenthesis doesn't occur until verse 46. Although it's okay to have a parenthesis on a different paragraph, it's good to check for these kinds of mistakes.
Delete Duplicates provides two options. Selecting Lowest Level will remove any instances of search results that appear within the lowest possible level (for example, in the scriptures the lowest level would be the verse). You can also choose to remove any results that occur together within other levels (for example, chapter or book) by selecting Other Levels...

Keep Sample
Instead of deleting duplicates, you can also choose to see a sample of the results. To do this, right-click on the results menu and click Keep Only a Sample. Alternatively, you can navigate to Results > Keep Only a Sample.
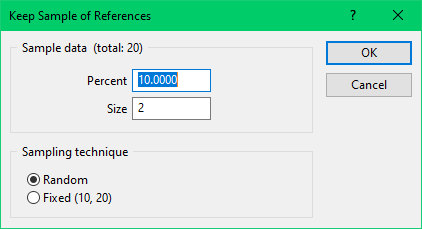
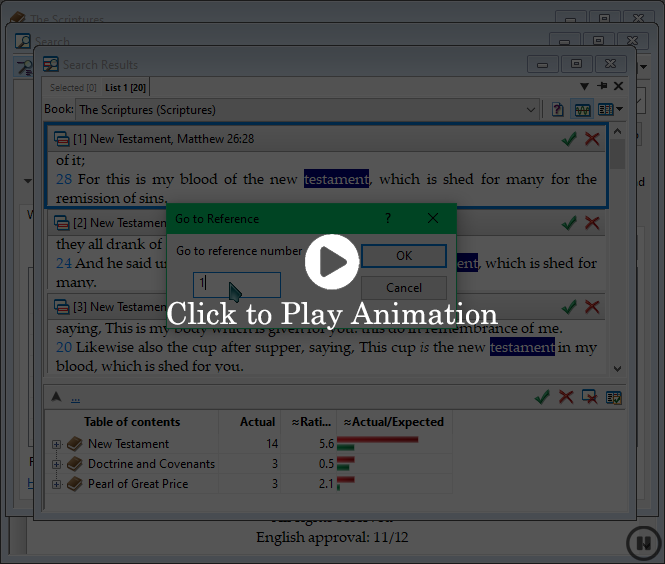
In the Percent field, specify the perent of the total you would like to keep. Alternatively, you can specify the number of references you would like to keep in the Size field.
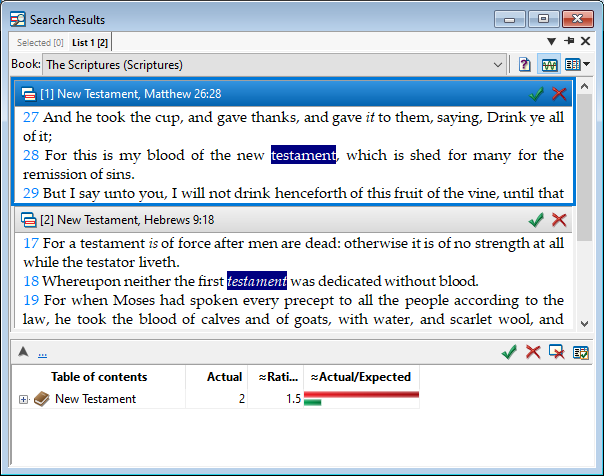
You can choose to use Random or Fixed intervals (such as every 10th reference) in the Sampling Technique field. When you are finished, click the OK button. Below is an example of a sample of 2 random results from a search for 'testament' which originally returned 20 results. This was retrieved using the settings in the above specified image.
Window Settings
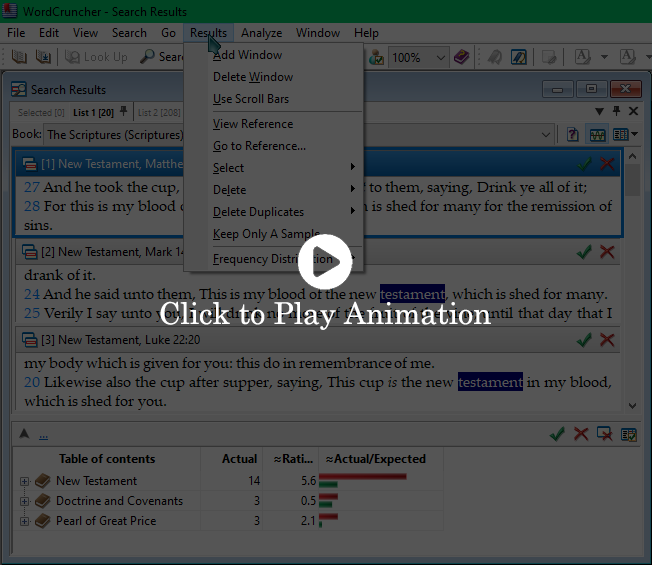
Opening the Results menu within the navigation bar will present you with multiple options for customization of the Search Results window. Add Window will increase the number of result panes currently displayed by one, while Delete Window will do the opposite. If you would like to be able to scroll within each result's pane to view more context for each hit, activating Use Scroll Bars will allow for this.
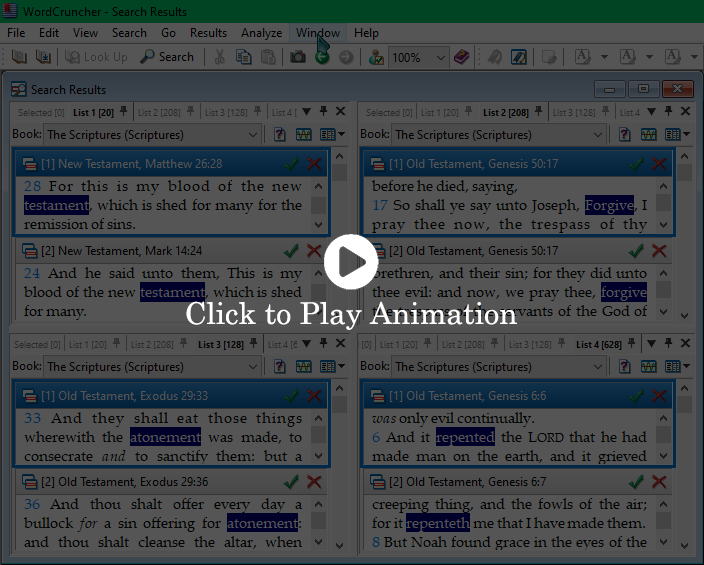
The Window menu also provides options for customization of the Search Results window. Relevant here are the options highlighted: selecting No Split will display the search results in their default form, with one list of result panes stacked vertically; Split Horizontally will split the Search Results window into to horizontal sections, allowing for viewing of two search result lists simultaneously; Split Vertically does the same thing, but splits the window vertically as opposed to horizontally; and finally, Split Tiled allows for viewing of four result lists simultaneously by splitting the Search Results window into quadrants.